Digital Signals
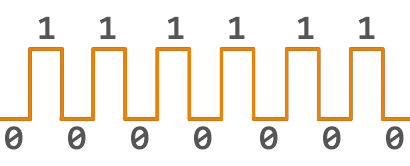
A digital signal is represented by a binary value. Either 1 or 0, HIGH or LOW, ON or OFF. This makes digital signals very easy to analyze. Digital signal is they do not produce noise…it’s either 1 or 0, nothing in between. Analog signals carry a value, not just on and off.
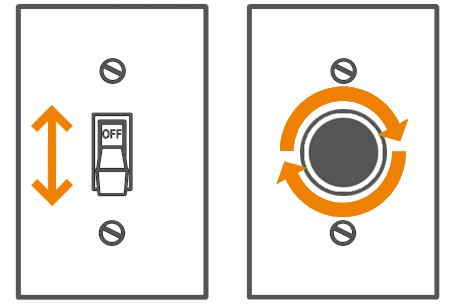
One way to understand the difference between analog and digital signals is a light switch. A standard on/off switch would be an example of how a digital signal works. It is either on or off. In contrast, a dimmer switch is analog as it sets the brightness (level) of a light.
Digital Output
Digital.Write() function is used to set a pin to high/low, true/false, one/zero. There are 2 arguments for Digital.Write(). The first one is the pin number and the second argument is the state to set the pin to.
Python
BrainPad.Digital.Write(2, True)C#
BrainPad.Digital.Write(2, true);JS
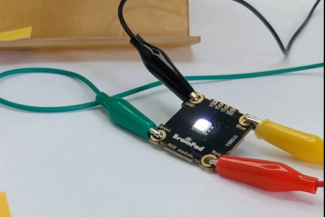
await BrainPad.Digital.Write(2, true);BrainPad boards have on-board LED. This LED is an output from the system’s perspective. The LED pin is a special pin that is found under the Pin class.
Python
BrainPad.Digital.Write(BrainPad.Pin.Led, True)C#
BrainPad.Digital.Write(BrainPad.Pin.Led, true);JS
await BrainPad.Digital.Write(BrainPad.Pin.Led, true);We can now run the code and the LED on the BrainPad will turn ON. Great! Now let’s go one step further and make it blink! To make the LED blink, we’re going to add a few more lines to our code. We need to create a way to repeat a section of code over and over again without having to type the same code multiple times. We do this by creating an endless loop. This means after the code reaches the end, it will go back to the top of the selected code section and run again and again…FOREVER.
Python
while True:
    BrainPad.Digital.Write(BrainPad.Pin.Led, True)
C#
while(true){
    BrainPad.Digital.Write(BrainPad.Pin.Led, true);
}
JS
while(true){
    await BrainPad.Digital.Write(BrainPad.Pin.Led, true);
}
Even though we’ve added all this extra code, nothing is different from the first section of code we created. If you run the code, the same thing will happen. The LED will turn on and stay on. We need to tell the LED to turn off in our code. Since we’re dealing with a digital signal, and true is ON. Can you guess what the number OFF might be? If you said false, then you are correct.
Python
while True:
    BrainPad.Digital.Write(BrainPad.Pin.Led, True)
     BrainPad.Digital.Write(BrainPad.Pin.Led, False)
C#
while(true){
    BrainPad.Digital.Write(BrainPad.Pin.Led, true);
    BrainPad.Digital.Write(BrainPad.Pin.Led, false);
}
JS
while(true){
    await BrainPad.Digital.Write(BrainPad.Pin.Led, true);
    await BrainPad.Digital.Write(BrainPad.Pin.Led, false);
}
If you run the above code, what do you think will happen? The LED will still not blink! Computers run very fast, faster than what our eyes can see. We need to add a pause between turning the LED ON and OFF. In other words, we need the LED to be on for some time and then off for some time. Let’s turn it on for one second and then off for another second.
Python
while True:
    BrainPad.Digital.Write(BrainPad.Pin.Led, True)
    BrainPad.System.Wait(1000)
    BrainPad.Digital.Write(BrainPad.Pin.Led, False)
    BrainPad.System.Wait(1000)
C#
while(true){
    BrainPad.Digital.Write(BrainPad.Pin.Led, true);
    BrainPad.System.Wait(1000);
    BrainPad.Digital.Write(BrainPad.Pin.Led, false);
    BrainPad.System.Wait(1000);
}
JS
while(true){
    await BrainPad.Digital.Write(BrainPad.Pin.Led, true);
    await BrainPad.System.Wait(1000);
    await BrainPad.Digital.Write(BrainPad.Pin.Led, false);
    await BrainPad.System.Wait(1000);
}
We now have a complete blinking LED program using the BrainPad’s Digital.Write() function.
Input
Just like we control a pin state, we can also read a pin’s state. This pin can be connected to a switch, for example, and we would need to know if the switch is on or off. Another example is a motion sensor, where a pin on the sensor will be activated when it detects motion.
To read a digital pin we use Digital.Read() function, which takes 2 arguments. The first argument is the pin number and the second is the pull state.
Python
p = BrainPad.Digital.Read(2, BrainPad.Pin.PullUp)C#
var p = BrainPad.Digital.Read(2, BrainPad.Pin.PullUp)JS
var p = await BrainPad.Digital.Read(2, BrainPad.Pin.PullUp)Similar to the LED, buttons ‘A’ and ‘B’ (if available) can be used as an identifier for the buttons.
What is the state of an unconnected pin? You might think it is zero/low but that is not true. An unconnected pin is called “floating” and its state is undefined. It can be high or low, depending on the surrounding noise. A built-in feature allows the pin to be pulled high or low. This does not set the pin to that state but weakly pulls it. A good example here is with the button use. When a button is pressed, it makes a connection between the pin and the circuit’s ground making the pin low. But when the button is not pressed, the pin is not connected to anything. This is where a pull-up comes in very handy.
Python
while True:
    if(BrainPad.Digital.Read(BrainPad.Pin.ButtonA, 1)==0):
        BrainPad.System.Println("ALARM")
    BrainPad.System.Wait(100)
C#
while(true){
    if(BrainPad.Digital.Read(BrainPad.Pin.ButtonA, BrainPad.Pin.PullUp)==false){
        BrainPad.System.Println("ALARM");
    }
    BrainPad.System.Wait(100);
}
JS
while(true){
    if(await BrainPad.Digital.Read(BrainPad.Pin.ButtonA, BrainPad.Pin.PullUp)==false){
        await BrainPad.System.Println("ALARM");
    }
    await BrainPad.System.Wait(100);
}
Digital Signals
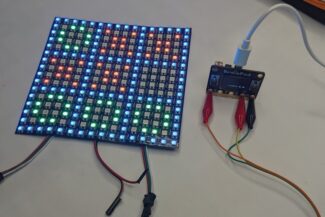
Since digital pins can change state very quickly, we can use that change to carry information. These are called data buses. Think of USB and Ethernet or data transferred digitally using a data bus. More on busses in other lessons.
BrainStorm
Do you have any idea why we created the led object before we created the while() loop? This is because we only need to create the led object once in our code when it runs the first time. We then want to repeat everything inside the while() loop. What happens if we turn OFF(0) the led first, and then turn it ON(1)? Try changing the value inside one of the Wait() methods and see what happens.