
Countdown Timer
This lesson will create a countdown timer. This can remind you to check on the pizza in the oven or to get off the computer and take a little walk!
Prerequisite
You must have a basic understanding of coding and have completed the Drawing lesson.
The Plan
A good countdown timer will have a way to set the time and a start button. Button A will be used to add 10 seconds when it is pushed. Button B will start the countdown.
The Countdown
We need an easy way to see counter, so it will need large digits.
var counter=12345;
Clear();
TextEx(counter, 0, 0, 4, 4);
Show();
counter = 12345
Clear()
TextEx(counter, 0, 0, 4, 4)
Show()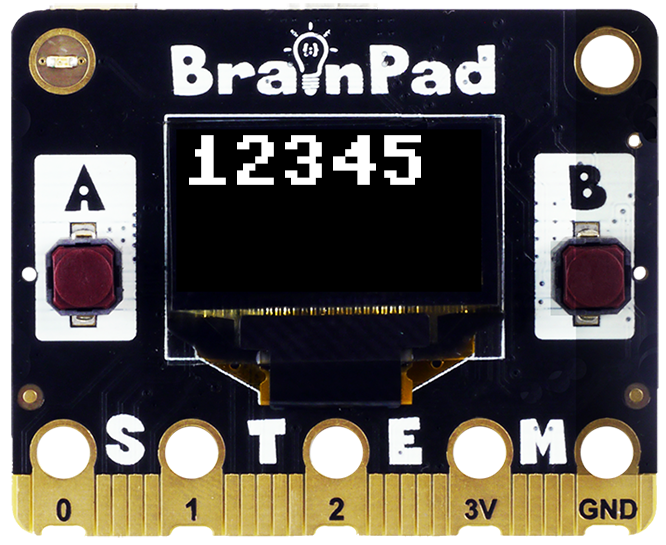
We can now add a loop to start counting down. We also need a one second delay so we are counting down once a second.
var counter = 12345;
while (true) {
    Clear();
    TextEx(counter, 0, 0, 4, 4);
    Show();
    counter = counter - 1;
    Wait(1);
}
counter = 12345
while True:
Clear()
TextEx(counter, 0, 0, 4, 4)
Show()
counter = counter - 1
Wait(1)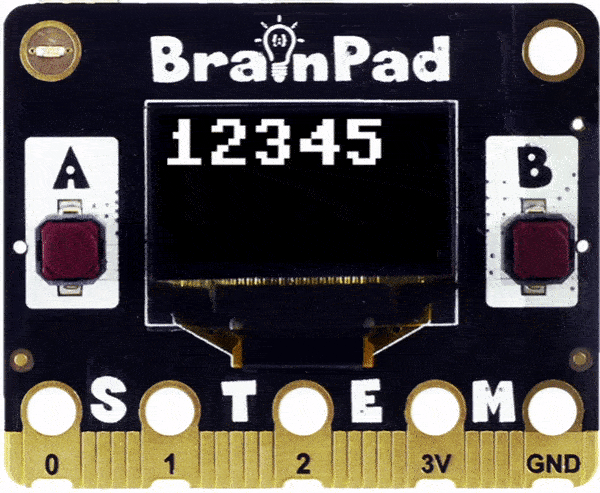
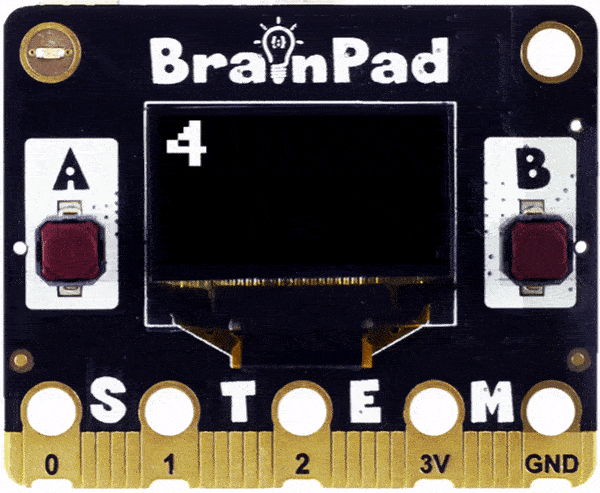
Instead of just starting immediately, we will create a loop that waits for the Button A to be pressed. In other words, keep looping as long as the button is not pressed. This loop will not do anything besides sit there waiting for the button to be pressed. Since we have nothing to do, we will Wait(0.01) in the loop.
Once button A is pressed, the loop will end and the next statement will be run, which is another loop; but this second loop is counting down.
var counter = 10;
var btnA = Button(ButtonA, 0);
var btnB = Button(ButtonB, 0);


TextEx(counter, 0, 2, 4, 4);
Show();

while (In(btnA) == 0) {
    Wait(0.01);
}

while (true) {
    Clear();
    TextEx(counter, 0, 2, 4, 4);
    Show();
    counter = counter - 1;
    Wait(1);
}
counter = 10
btnA = Button(ButtonA, 0)
btnB = Button(ButtonB, 0)
TextEx(counter, 0, 2, 4, 4)
Show()
while In(btnA) == 0:
Wait(0.01)
while True:
Clear()
TextEx(counter, 0, 2, 4, 4)
Show()
counter = counter - 1
Wait(1)Why did we add code to print the counter at the top of our program? Without placing the TextEx() line in our code, the screen will be blank if Butten A is not pressed and you’ll think something is wrong. Without it, the loop will print the counter counting down when the program starts only after Button A to be pressed, and so nothing will show on the screen. Try removing that line and see for yourself!
We are now ready to check if Button B is pressed to increment the counter starting number by 10. This will happen within the loop where we check if Button A is pressed. To summarize, a loop is checking for a Button A press and within this loop we will check if Button B is pressed to increase the counter. Make sense?
We also want another thing to happen when Button B is pressed. That is, we want the new value to show on the screen every time we increase the counter.
var counter = 10;
var btnA = Button(ButtonA, 0);
var btnB = Button(ButtonB, 0);

TextEx(counter, 0, 0, 4, 4);
Show();

while (In(btnA) == 0) {
    if (In(btnB) == 1){
        Clear();
        TextEx(counter, 0, 0, 4, 4);
        Show();
        counter = counter + 10;
    }
}
while (true) {
    Clear();
    TextEx(counter, 0, 2, 4, 4);
    Show();
    counter = counter - 1;
    Wait(1);
}
counter = 10
btnA = Button(ButtonA, 0)
btnB = Button(ButtonB, 0)
TextEx(counter, 0, 0, 4, 4)
Show()
while In(btnA) == 0:
if In(btnB) == 1:
Clear()
TextEx(counter, 0, 0, 4, 4)
Show()
counter = counter + 10
while True:
Clear()
TextEx(counter, 0, 2, 4, 4)
Show()
counter = counter - 1
Wait(1)Since computers do not mind repeating tasks, we can simplify our code by making it print the counter in every loop, no matter if the counter changed or not. If the counter got increased, then the new value will show on the screen. And if it was not changed, then the old value will show over and over. This may seem redundant, but computers do not mind and the code looks simpler. It is up to you to decide which way is better for you.
var counter = 10;
var btnA = Button(ButtonA, 0);
var btnB = Button(ButtonB, 0);

while (In(btnA) == 0) {
    Clear();
    TextEx(counter, 0, 0, 4, 4);
    Show();
    if (In(btnB) == 1){
        counter = counter + 10;
    }
}
while (true) {
    Clear();
    TextEx(counter, 0, 2, 4, 4);
    Show();
    counter = counter - 1;
    Wait(1);
}
counter = 10
btnA = Button(ButtonA, 0)
btnB = Button(ButtonB, 0)
while In(btnA) == 0:
Clear()
TextEx(counter, 0, 0, 4, 4)
Show()
if In(btnB) == 1:
counter = counter + 10
while True:
Clear()
TextEx(counter, 0, 2, 4, 4)
Show()
counter = counter - 1
Wait(1)Looks like we have a countdown timer, but wait! What happens when the counter reaches zero? Well, we did not check for that and so the loop will continue into negative numbers!
We can check for counter >= 0 in the while loop and continue as we wish. In the below example, we will simply terminate the loop once 0 is reached.
Do you see this coding style? It is a loop after a loop, and the ending loop takes the program to the next statement/loop. Notice how we positioned “DONE!” to show on the same line as the countdown? Try it without the Clear() line and see what happens. Not so “clear”, right?
var counter = 10;
var btnA = Button(ButtonA, 0);
var btnB = Button(ButtonB, 0);
while (In(btnA) == 0) {
    Clear();
    TextEx(counter, 0, 2, 4, 4);
    Show();
    if (In(btnB) == 1){
        counter = counter + 10;
    }
}
while (counter >= 0) {
    Clear();
    TextEx(counter, 0, 2, 4, 4);
    Show();
    counter = counter - 1;
    Wait(1);
}
Clear();
TextEx("DONE!", 0, 0, 4, 4);
Show();
counter = 10
btnA = Button(ButtonA, 0)
btnB = Button(ButtonB, 0)
while In(btnA) == 0:
Clear()
TextEx(counter, 0, 0, 4, 4)
Show()
if In(btnB) == 1:
counter = counter + 10
while counter >= 0:
Clear()
TextEx(counter, 0, 2, 4, 4)
Show()
counter = counter -1
Wait(1)
Clear()
TextEx("DONE!", 0, 0, 4, 4)
Show()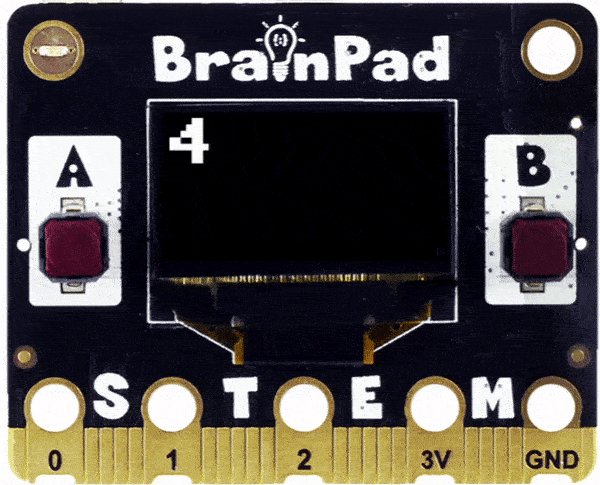
All is good now except we need to do something better than Print(“DONE!”).
The Alarm
There are different ways to make an alarm noise, and the easiest way is to sweep through frequencies, from 50 to 5000. Keep the code above the same and add the alarm loop.
var buzz = Sound(Buzzer, 0, 100);
var f = 50;
while (true) {
    Out(buzz, f);
    f = f + 100;
    if (f > 5000){
        f = 50;
    }
}
buzz = Sound(Buzzer, 0, 100)
f = 50
while True:
Out(buzz, f)
f = f + 100
if f > 5000:
f= 50
Using BrainPower, can we also vibrate when making noise? Instead of it being always on, we will cycle it on and off in every loop. We will do so by using a variable to keep track of its current state.
var buzz = Sound(Buzzer, 0, 100);
var pin = Digital(P1);
var state = 0;
var f = 50;
while (true) {
    Out(buzz, f);
    f = f + 100;
    if (f > 5000) {
        f = 50;
        if (state == 0) {
            state = 1;

        }
        else {
            state = 0;
        }
        Print(state);
        Out(pin, state);
    }
}
buzz = Sound(Buzzer, 0, 100)
pin = Digital(P1)
state = 0
f = 50
while True:
Out(buzz, f)
f = f + 100
if f > 5000:
f= 50
if(state == 0):
state = 1
else:
state = 0
Print(state)
Out(pin, state)
What’s Next?
Give the screen a “face” and turn it into an Analog Watch.
BrainStorm
On the coding front, what do you think is missing from our countdown timer to be a complete product? How do we terminate the alarm? Can you check for a button press to stop the alarm? How do we restart and reuse the counter? Can we have our program loop back to the very top and repeat the entire code? Hint: Repeat = loop!