
Project Overview
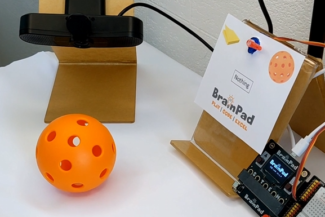
IR Remote Reciever with BrainPad microcomputer
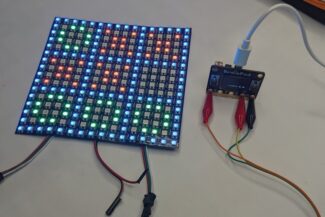
Embark on an exciting journey of controlling your computer using an IR remote control by Python script. This project involves connecting an IR receiver to the BrainPad Pulse, enabling you to create a Python graphical user interface (GUI) that mirrors the IR remote control. Each button press on the remote control triggers a blinking effect on the corresponding label in the GUI, providing visual feedback.
How It Works
Python code is employed to establish a connection, interpret IR receiver values, and update the GUI dynamically. The GUI consists of labels representing different buttons on the IR remote control, and each label blinks when the corresponding button is pressed.

Hardware Requirements
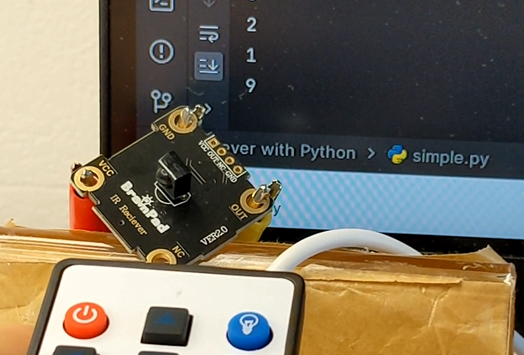
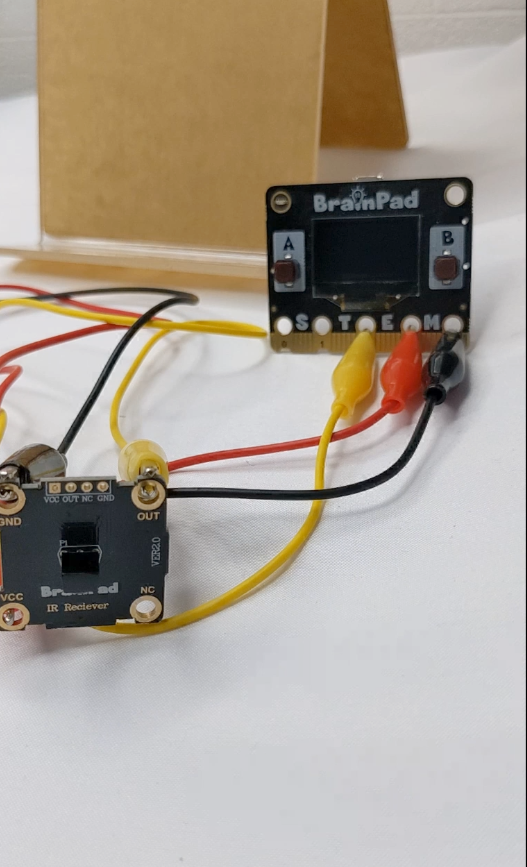
To build this project, you can use any BrainPad microcomputer like BrainPad Pulse, and from the BrainClip kit we need IR Receiver and BrainPad remote control, as well as some alligator clip wires.
Note: The IR decoder is fixed to pins 2 and 8
Software Requirements
Ensure you have Python 3.10 installed on your computer. Install the required library using the following command:
pip install DUELink

pip install tk
Code Overview
Let us break down the Python code into smaller steps and provide a comprehensive explanation for each part:
import tkinter as tk
from DUELink.DUELinkController import DUELinkController

# Get the connection port for DUELinkController
ava = DUELinkController.GetConnectionPort()

# Create an instance of DUELinkController
BrainPad = DUELinkController(ava)

# Enable the infrared feature on DUELinkController
BrainPad.Infrared.Enable(2, 1)

# Mapping of label content to corresponding values
label_to_value = {
    'Power Off': 0,
    'UP': 1,
    'Light': 2,
    'RIGHT': 4,
    'Sound': 5,
    'LEFT': 6,
    'Back Left': 8,
    'DOWN': 9,
    'Back Right': 10,
    '+': 12,
    '0': 13,
    '-': 14,
    '1': 16,
    '2': 17,
    '3': 18,
    '4': 20,
    '5': 21,
    '6': 22,
    '7': 24,
    '8': 25,
    '9': 26
}

# Function to handle label blinking based on received value
def handle_label_blink(label, value, blink_count):
    current_text = label.cget("text")
    if current_text in label_to_value and label_to_value[current_text] == value and blink_count > 0:
        current_bg = label.cget("bg")
        new_bg = "yellow" if current_bg == "white" else "white"
        label.config(bg=new_bg)
        root.after(100, handle_label_blink, label, value, blink_count - 1)
    else:
        label.config(bg="white")

# Function to update the GUI with received values
def update_gui(labels):
    x = BrainPad.Infrared.Read()
    label.config(text=f"Received Value: {x}")

    # Check each label for a match with the received value and initiate label blinking
    for i, row in enumerate(labels):
        for j, lbl in enumerate(row):
            label_value = lbl.cget("text")
            if label_value in label_to_value and label_to_value[label_value] == x:
                handle_label_blink(lbl, x, blink_count=3)  # Change 3 to the desired number of blinks

    # Schedule the next GUI update after 100 milliseconds
    root.after(100, update_gui, labels)

# Create the main window
root = tk.Tk()
root.title("IR Remote GUI")

# Create a label to display the received value
label = tk.Label(root, text="Received Value: None", font=("Helvetica", 16))
label.grid(row=0, column=0, columnspan=3, pady=10)

# Define the layout for the labels
layout = [
    ['Power Off', 'UP', 'Light'],
    ['RIGHT', 'Sound', 'LEFT'],
    ['Back Left', 'DOWN', 'Back Right'],
    ['+', '0', '-'],
    ['1', '2', '3'],
    ['4', '5', '6'],
    ['7', '8', '9']
]

# Create labels dynamically based on the layout
label_layout = []
for i, row in enumerate(layout):
    current_row = []
    for j, text in enumerate(row):
        current_label = tk.Label(root, text=text, width=8, height=2, bg="white")
        current_label.grid(row=i+1, column=j, padx=5, pady=5)
        current_row.append(current_label)
    label_layout.append(current_row)

# Start the periodic update of the GUI
update_gui(label_layout)

# Run the GUI
root.mainloop()
Customization:
- Blink style:
Adjust the blink count and color in the “handle_label_blink” function to control the number of blinks for each button press.
- BrainPad Edge Exploration:
Adapt the project for BrainPad Edge. Observe behavior shifts with distinct hardware, modifying code as needed.
- Diverse Languages with BrainPad:
Explore languages like C# or JavaScript on BrainPad available here. Rewrite the logic to match language syntax and unleash the microcomputer’s versatility.


Start the discussion at GHI Electronics forums