Drawing

The Drawing built-in functions give you full access to the display/LED-matrix. This is nice to have in most cases and becomes a requirement in some, like when creating video games.
Prerequisite
This lesson assumes you have completed the Built-in Function lesson.
Intro
We have been mostly using the display through the System.Print() function. Instead of doing that, we will take over the display and fully control what shows on it.
Graphical Memory
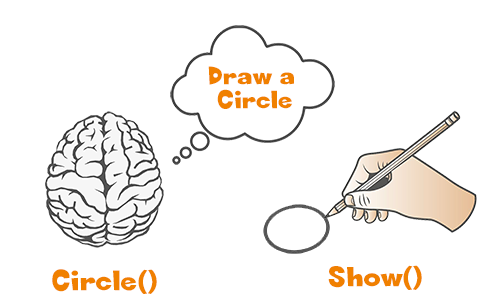
On computer systems, it is standard to handle all the “drawing” in memory, not on the display/monitor. Only when drawing elements of the memory is complete does the memory transfer to the display as a whole. Similar to the way our own brain works, we think about what we’re going to draw in our mind and then we draw it.
Even when clearing the screen, Clear() will only clear the graphics memory internally. This has no effect on the display. But then Show() will transfer whatever is in the graphical memory to the screen.
Note how Print() updates the screen without Show(). This is because of extra code built into the Print() function to make it easier to use. However, this makes Print() slower than the other drawing functions. Once you have decided you will use the display API on this page, you should not use Print() to eliminate confusion.
Color Value
The system supports Color and B&W displays. To keep uniformity, 0 is always black and 1 is always white. Any other value is considered a standard RGB color formatted 0xRRGGBB. For example, GHI Electronics blue is 0x0977aa.
BrainPad.Display.Clear(1); //white background
BrainPad.Display.DrawCircle(0x0977aa,60,32,25); // blue circle
BrainPad.Display.Show();
X and Y coordinates
X and Y coordinates inside code refers to an exact pixel location on the screen. This is often used to set the position of where something will appear on the screen.
Unlike vectors in math where x/y origin start at the lower left corner, computer graphics start at the top left corner.
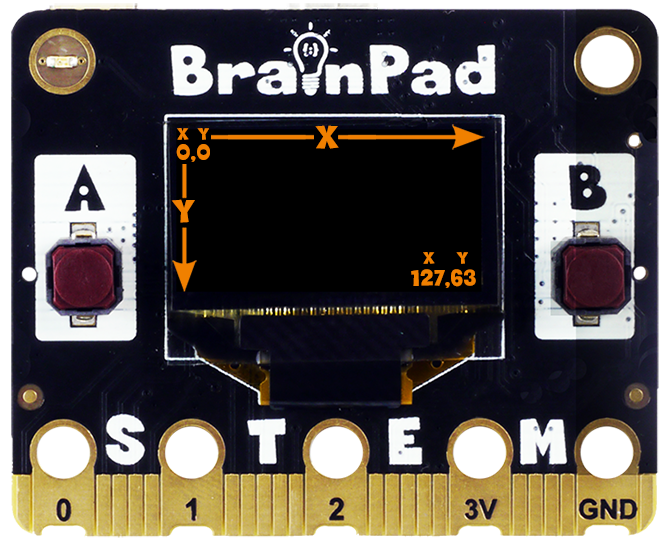
With origin starting at the top left corner, X values run left to right starting at 0 on the very left., while Y values run top to bottom starting with 0 at the very top. This means the top left X and Y coordinate is 0,0. The BrainPad Pulse has 128 pixels across (X) by 64 pixels down (Y), making the bottom right corner 127,63 (remember 0 is the first pixel, not 1).
Show()
This function will transfer the graphical memory to the display as explained above. All methods below only affect the graphical memory and do not affect the display at all.
Clear()
Clears the screen. Remember, this clears the graphical memory and not the display. Show() is needed to transfer the graphical memory to the display. For the sake of demonstration, we will draw a line on the screen, then Clear() the screen, then draw a circle. Running the code below will result in a circle on the screen but not the line. Why? The line was drawn on the graphical memory, which got cleared using Clear(). Then the circle was drawn on the graphical memory and then show transferred the memory to the display.
await BrainPad.Display.Clear(0);
await BrainPad.Display.DrawLine(1, 20, 30, 88, 44);
await BrainPad.Display.DrawCircle(1, 60, 32, 25);
await BrainPad.Display.Show();
DrawCircle()
DrawCircle() generates a circle in memory, remember we must call Show() to actually see the circle on the display. The DrawCircle(color, x, y, r) function requires 4 arguments: color (1 for white and 0 for black) an x and y position on the display, and the r is the radius of the circle.
await BrainPad.Display.DrawCircle(1,60,32,25);
await BrainPad.Display.Show();
DrawLine()
DrawLine() does exactly as its name suggests. It creates a line from one point to another point. The DrawLine(color,x1, y1, x2, y2) function requires 5 arguments: color the the x and y starting position followed by the x and y finishing position. Like all other drawing methods you’ll still need to call Show() to actually display the line on the screen.
await BrainPad.Display.DrawLine(1,25,21,100,50);
await BrainPad.Display.Show();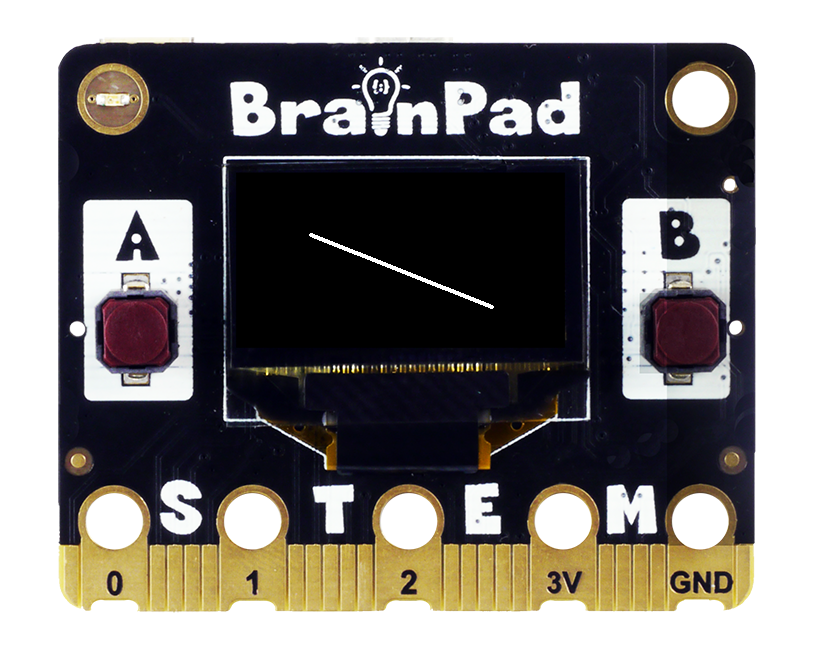
DrawText()
This is similar to the basic Print() function, but DrawText() gives you better control as to where the text is placed on the screen. The DrawText(text, x, y) function takes 4 arguments: first is the text to be displayed followed by color then its x and y location on the screen. Unlike the Print() function , you’ll have to follow with the Show() function to display.
await BrainPad.Display.DrawText("Hello Brain",1,30,30);
await BrainPad.Display.Show();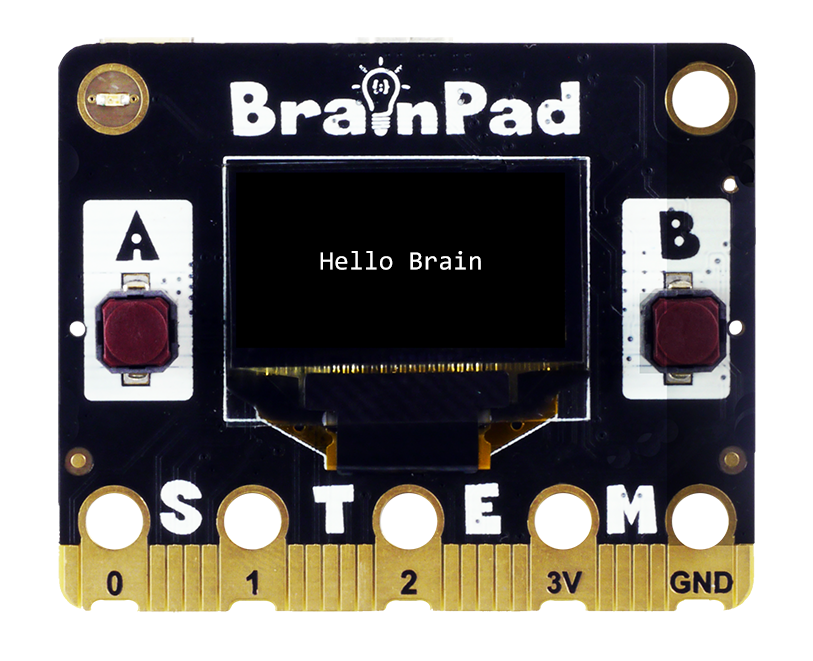
DrawTextScale()
DrawTextScale() function works like the DrawText() method except it adds scaling so you can make larger text or tall skinny text, depending on how you change the scale. The DrawTextScale(text, color, x, y, scaleWidth, scaleHeight) function takes 6 arguments.
await BrainPad.Display.DrawTextScale("Large Text",1,0,30,2,2);
await BrainPad.Display.Show();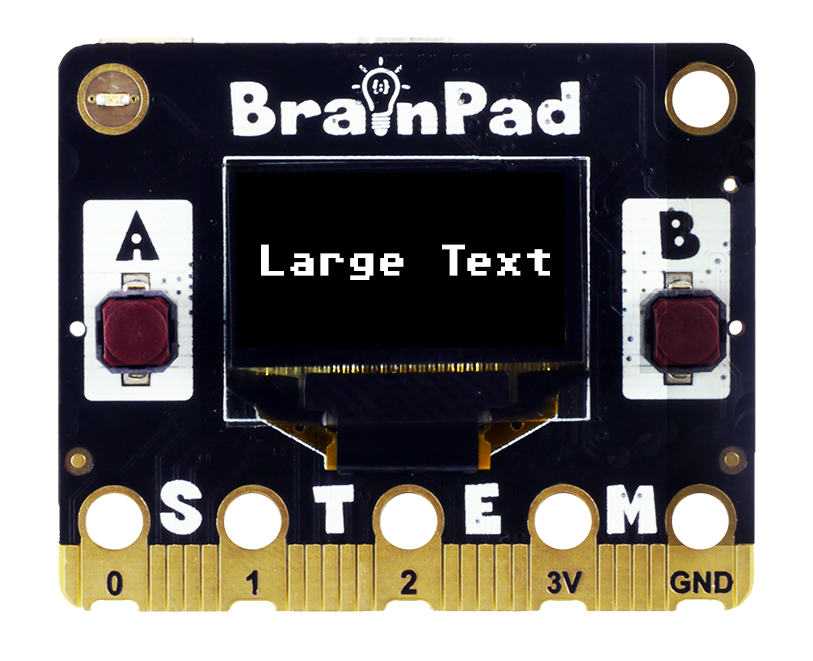
DrawRectangle()
The DrawRectangle() function Draws a rectangle on the screen. DrawRectangle(color, x, y, w, h) requires 4 arguments: color then the x coordinate, y coordinate, width, and then height.
await BrainPad.Display.DrawRectangle(1,40,10,50,50);
await BrainPad.Display.Show();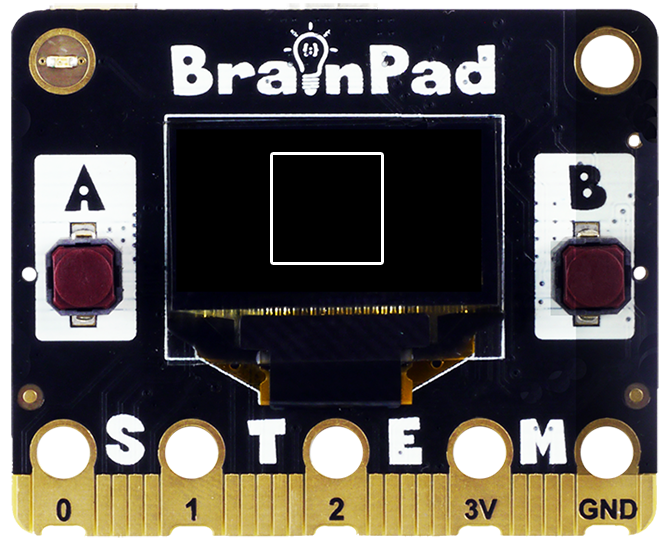
How do you draw a DrawRectangle() that sets a border on the very edges of the screen? If the display is 128×64 in size and the screen starts at 0x0, what would the last pixel be, 127×63 or 128×64?
DrawFillRect()
Works just like DrawRectangle() function, but this one will fill the rectangle: FillRect(color, x, y, w, h).
await BrainPad.Display.DrawFillRect(1,40,10,50,50);
await BrainPad.Display.Show();
This is also useful to clear part of the screen by fulling an area with black.
Inverting Colors
An option is to clear the screen to while instead of black and then draw in black. Another option is to fill part of the screen with white and draw black on top of it.
await BrainPad.Display.DrawFillRect(1, 15, 10, 100, 50);
await BrainPad.Display.DrawText("Hello World", 0, 30, 30);
await BrainPad.Display.Show();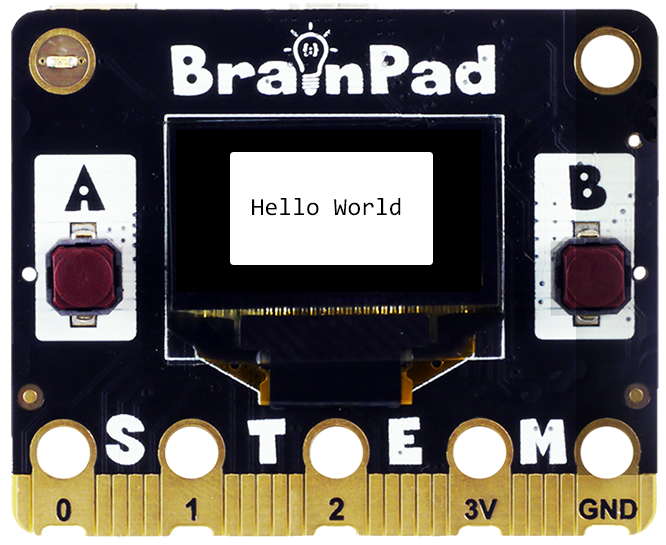
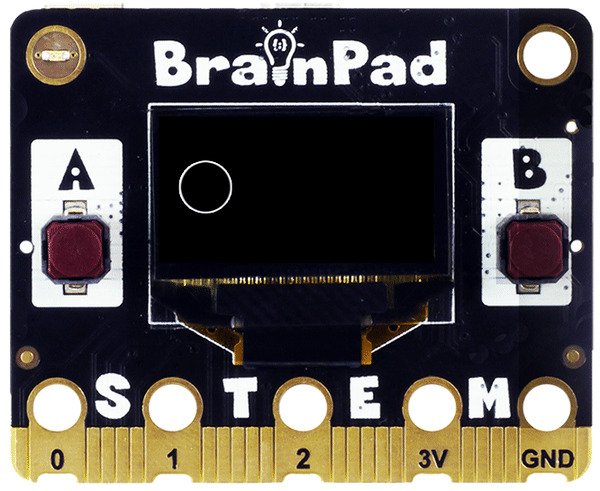
SetPixel()
Draws a point (a pixel) on the screen. The SetPixel() function requires 3 arguments. First is color then the x and y coordinates.
await BrainPad.Display.SetPixel(1,64,32);
await BrainPad.Display.Show();
You may have to look VERY closely to see the pixel on the screen. The BrainPad Pulse in particular has 8,192 of them that make up the entire screen.

A single point is not much fun. We need to try something more interesting! Let’s get a random number to use as a random location on where the next point should be. We think you will like the results.
BrainPad.Display.Clear(0);
while(true){
    let x = Math.random()*127;
    let y = Math.random()*64;
    await BrainPad.Display.SetPixel(1,x, y);
    await BrainPad.Display.Show();
}
Animations
We can make shapes appear to be moving on the screen by clearing the screen and placing the shape at the new location. An example would be to move a DrawCircle() across the screen. The circle will move on the x-axis from 10 to 100 with 3 steps in each loop. Note that the DrawCircle() is NOT moving! Your eyes see it moving, but it is actually just a new circle that is getting drawn on a new location while clearing the old one.
let x = 10;
while(x<100){
    await BrainPad.Display.Clear(0);
    await BrainPad.Display.DrawCircle(1, x, 32, 10);
    await BrainPad.Display.Show();
    x = x + 3;
}
Try removing the DisplayClear() function from the code above and try again. What do you think the screen would look like?
DrawImage()
There are cases where images need to be added to the screen. Of course, we are taking about basic simple images, more like a tiny sprite in a game. Think 8bit and 80s here!
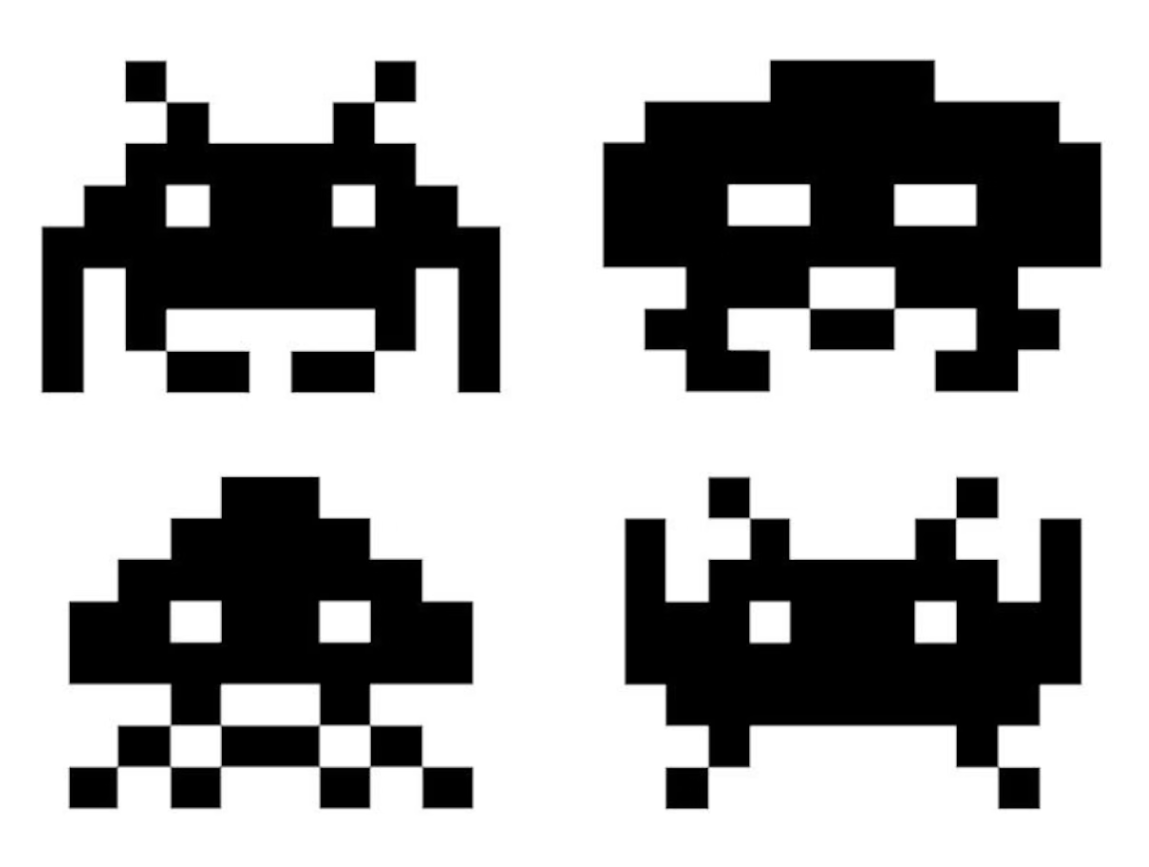
The image is an array of pixels. This arrays must start with 2 elements that contain the image’s width and height. We will place the array on multi line to help us visualize what the image might look like, but placing everything on a single line has the same effect. The second and third arguments are the sprite position on the screen. The last argument is transform.
Can you visualize what this code will produce before looking at the screen?
let alien = [8,8,
0, 0, 0, 1, 1, 0, 0, 0,
0, 0, 1, 1, 1, 1, 0, 0,
0, 1, 1, 1, 1, 1, 1, 0,
1, 1, 0, 1, 1, 0, 1, 1,
1, 1, 1, 1, 1, 1, 1, 1,
0, 0, 1, 0, 0, 1, 0, 0,
0, 1, 0, 1, 1, 0, 1, 0,
1, 0, 1, 0, 0, 1, 0, 1];

await BrainPad.Display.Clear(0);
await BrainPad.Display.DrawImage(alien,55,30,BrainPad.Display.TransformNone);
await BrainPad.Display.Show();
Can you now move the Alien across the screen like we did with the Display.DrawCircle()? Or make him show everywhere randomly?
DrawImageScale()
This is identical to the previous function except it adds scaling to make the image larger, taller, or wider!
await BrainPad.Display.Clear(0);
await BrainPad.Display.DrawImageScale(alien,55,30,3,3,BrainPad.Display.TransformNone);
await BrainPad.Display.Show();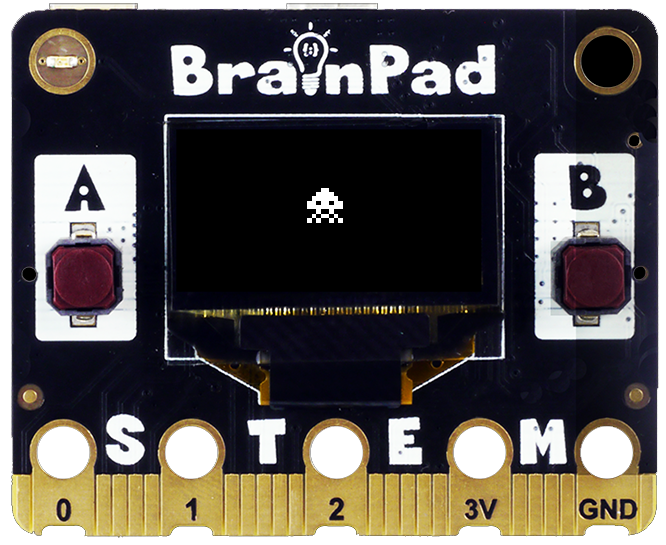
Display Configuration
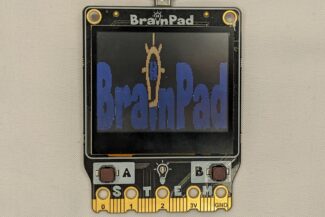
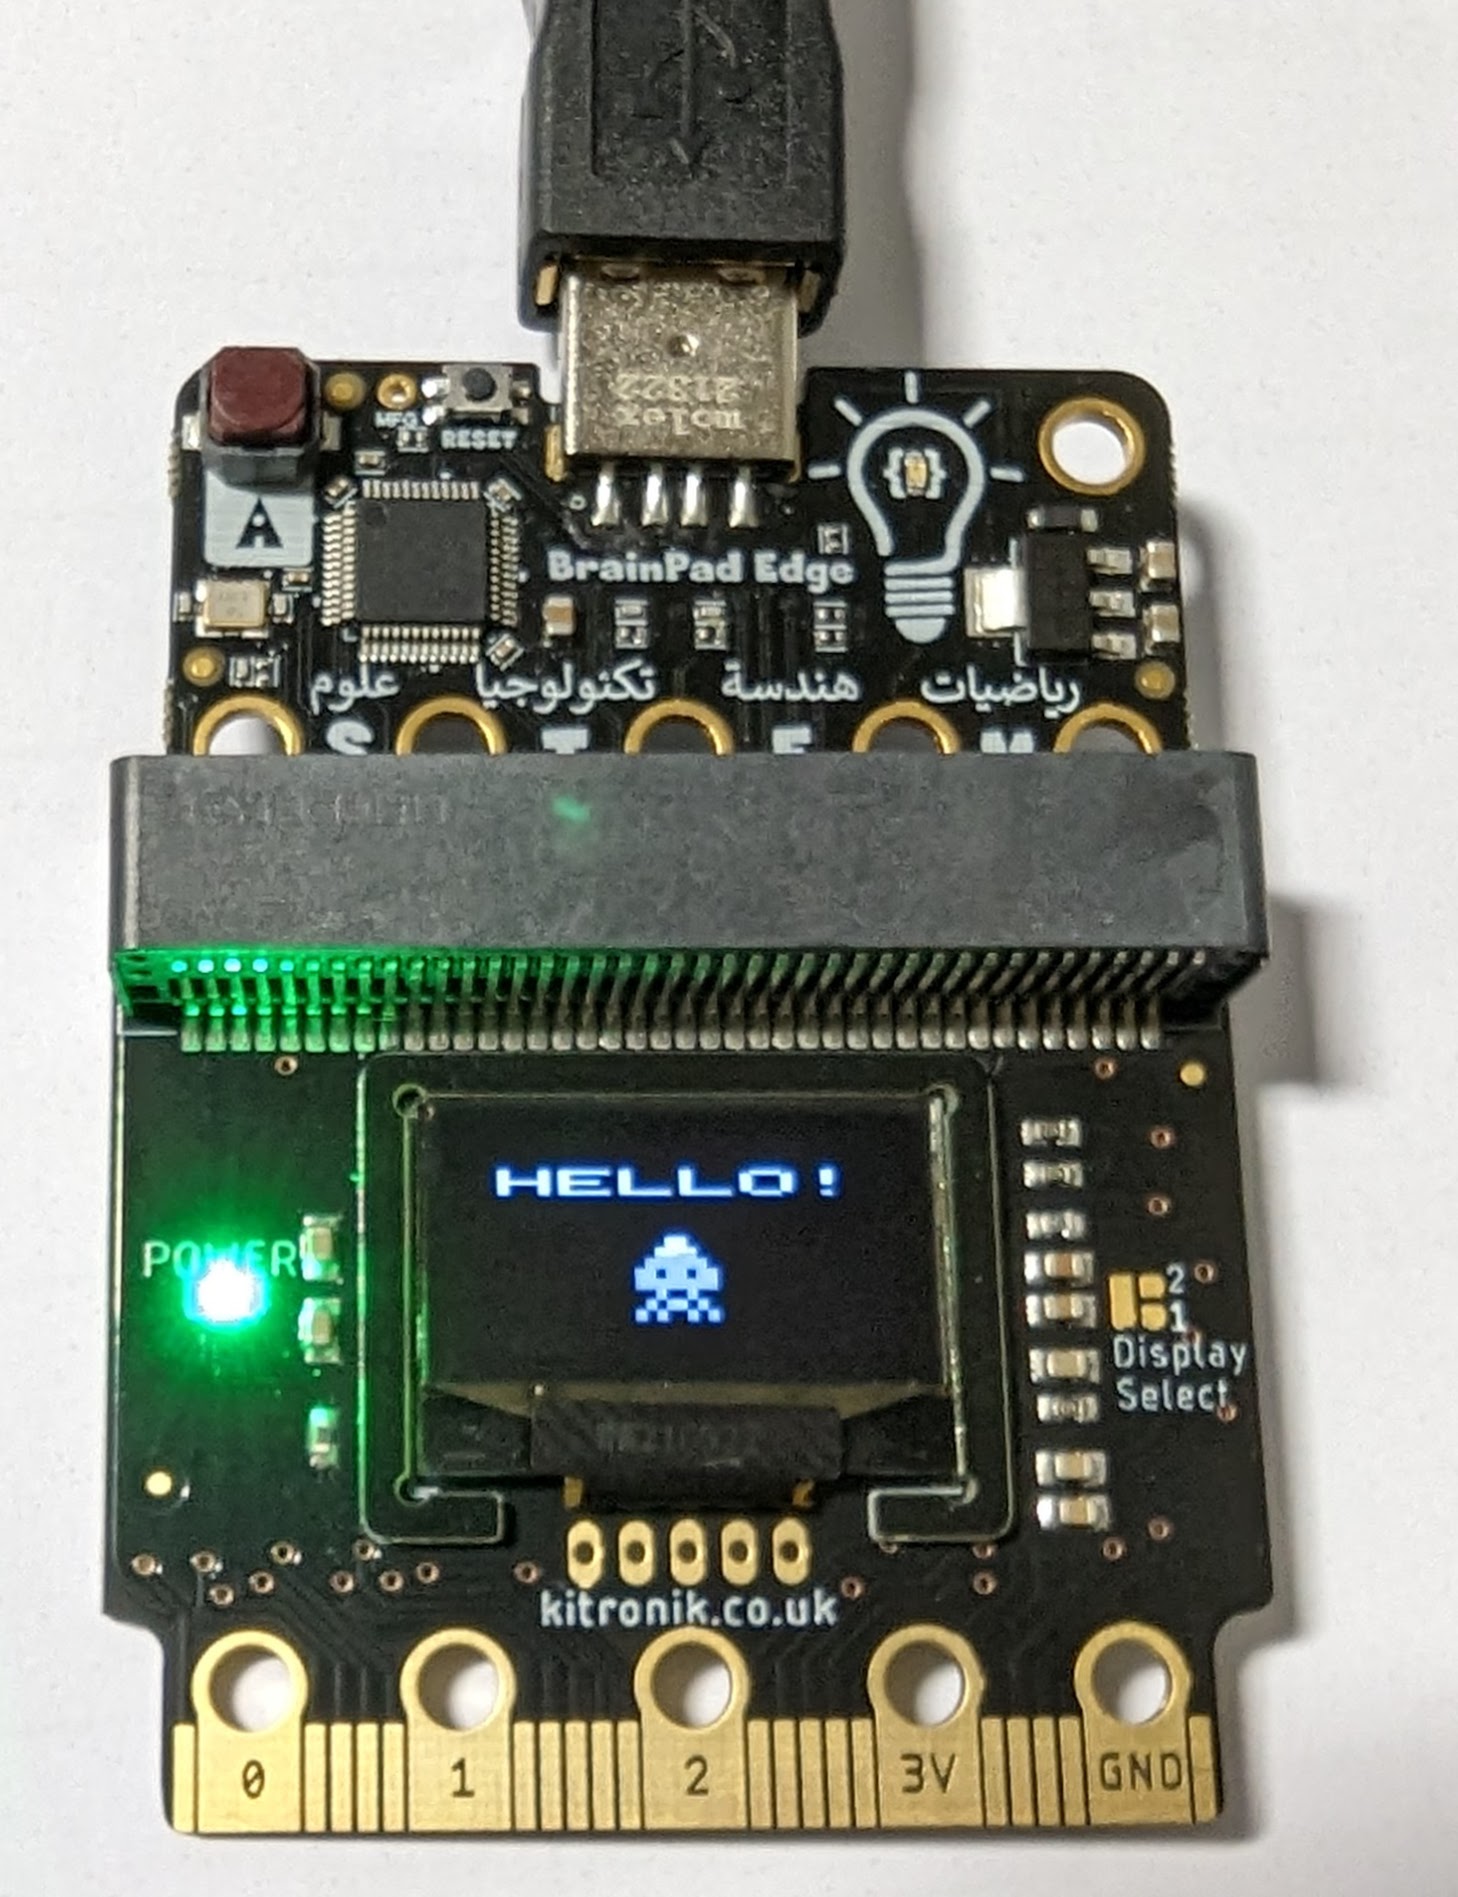
The internal software of any BrainPad microcomputer include support for graphics. Some include onboard displays for easy no-wiring option, like BrainPad Pulse for example. External displays can be wired as well.
B&W Displays
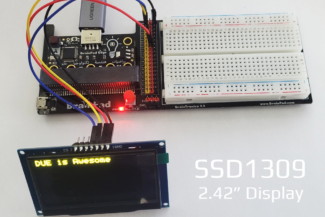
For B&W display, BrainPad supports SSD1309 I2C 128×64, similar to the one found on BrainPad pulse. An example display option is this plug-and-play option from Kitronik.
Those SSD1309 displays are also available in larger 2.42″ format. In this example, BrainPad Edge and BrainTronics are used to wire the display. Beside power, there are 2 wires that are needed. Those are the SDA and SCL pins that make up the I2C bus.
The only configuration needed for SSD1309 is its I2C address. It is typically 0x3C, but check your display’s documentation for the correct address.
BrainPad.Display.Configuration.Type = DisplayType.SSD1306;
BrainPad.Display.Configuration.I2cAddress = 0x3C;
BrainPad.Display.Configuration.Update();
Color Displays
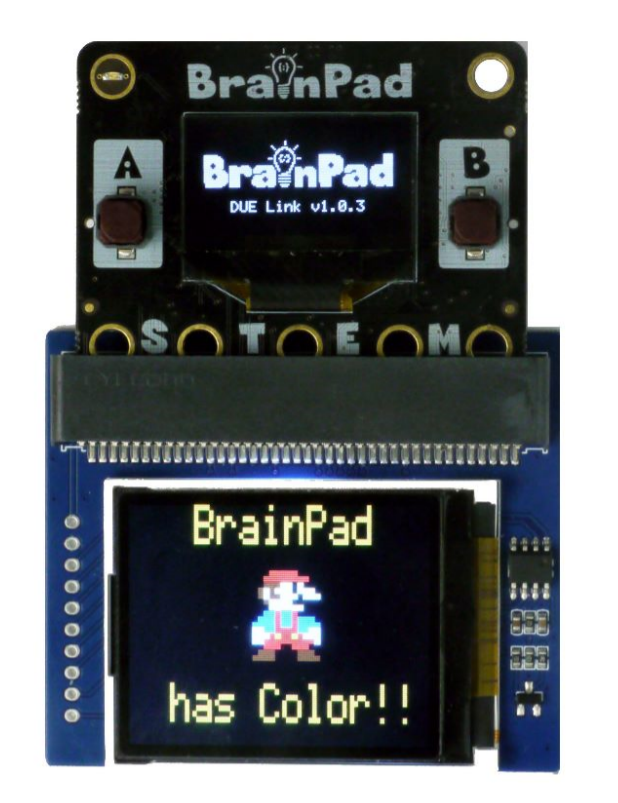
Support for color SPI displays includes ILI9342, ILI9341, and ST7735. These color displays only work on BrainPad boards with SC13 micro, such as BrainPad Pulse. The configuration for these displays includes many settings. Some settings are for selecting the control pins and others are for changing the display’s behavior.
This example configures BrainPad pulse to work with 1.8″ display board from Waveshare, which uses ST7735 1.8″ display. The display’s chip select is on pin 16 ands data control is on pin 12. There is also a backlight on pin 1 and reset on pin 8. More details on the LCD config are on the DUE Link website.
var reset = 8;
var backlight = 1;
await BrainPad.Digital.Write(backlight, true); // Enable backlight
await BrainPad.Digital.Write(reset, true); // release reset
BrainPad.Display.Configuration.Type = due.DisplayType.ST7735;
BrainPad.Display.Configuration.SpiChipSelect = 16;
BrainPad.Display.Configuration.SpiDataControl = 12;
BrainPad.Display.Configuration.SpiPortrait = false;
BrainPad.Display.Configuration.SpiFlipScreenVertical = true;
BrainPad.Display.Configuration.SpiFlipScreenHorizontal = false;
BrainPad.Display.Configuration.SpiSwapByteEndianness = false;
BrainPad.Display.Configuration.SpiSwapRedBlueColor = false;
await BrainPad.Display.Configuration.Update();
await BrainPad.Display.Clear(0);
await BrainPad.Display.DrawTextScale("BrainPad", 0xf08000, 35, 0, 2, 3);
await BrainPad.Display.DrawTextScale("Has Color!!", 0xf08000, 22, 95, 2, 3);
await BrainPad.Display.Show();
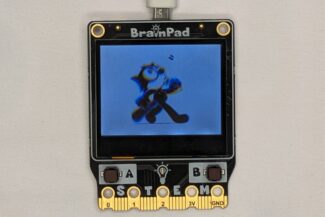
let a = [16,16,
0, 0, 0, 0, 0, 0xFF0000, 0xFF0000, 0xFF0000, 0xFF0000, 0xFF0000, 0, 0, 0, 0, 0, 0,
0, 0, 0, 0, 0xFF0000, 0xFF0000, 0xFF0000, 0xFF0000, 0xFF0000, 0xFF0000, 0xFF0000, 0xFF0000, 0, 0, 0, 0,
0, 0, 0, 0, 0x542200, 0x542200, 0x542200, 0xEEDCAA, 0xEEDCAA, 0, 0xEEDCAA, 0, 0, 0, 0, 0,
0, 0, 0, 0x542200, 0xEEDCAA, 0x542200, 0xEEDCAA, 0xEEDCAA, 0xEEDCAA, 0, 0xEEDCAA, 0xEEDCAA, 0xEEDCAA, 0, 0, 0,
0, 0, 0, 0x542200, 0xEEDCAA, 0x542200, 0x542200, 0xEEDCAA, 0xEEDCAA, 0xEEDCAA, 0, 0xEEDCAA, 0xEEDCAA, 0xEEDCAA, 0, 0,
0, 0, 0, 0, 0x542200, 0xEEDCAA, 0xEEDCAA, 0xEEDCAA, 0xEEDCAA, 0, 0, 0, 0, 0, 0, 0,
0, 0, 0, 0, 0, 0xEEDCAA, 0xEEDCAA, 0xEEDCAA, 0xEEDCAA, 0xEEDCAA, 0xEEDCAA, 0, 0, 0, 0, 0,
0, 0, 0, 0,0x0044A9, 0x0044A9, 0xFF0000, 0x0044A9, 0x0044A9, 0xFF0000, 0, 0, 0, 0, 0, 0,
0, 0, 0, 0x0044A9, 0x0044A9, 0x0044A9, 0xFF0000, 0x0044A9, 0x0044A9, 0xFF0000, 0x0044A9, 0x0044A9, 0x0044A9, 0, 0, 0,
0, 0, 0x0044A9, 0x0044A9, 0x0044A9, 0x0044A9, 0xFF0000, 0x0044A9, 0x0044A9, 0xFF0000, 0x0044A9, 0x0044A9, 0x0044A9, 0x0044A9, 0, 0,
0, 0, 0xEEDCAA, 0xEEDCAA, 0x0044A9, 0x0044A9, 0xFF0000, 0xFF0000, 0xFF0000, 0xFF0000, 0x0044A9, 0x0044A9, 0xEEDCAA, 0xEEDCAA, 0, 0,
0, 0, 0xEEDCAA, 0xEEDCAA, 0xEEDCAA, 0xFF0000, 0xFFDD00, 0xFF0000, 0xFF0000, 0xFFDD00, 0xFF0000, 0xEEDCAA, 0xEEDCAA, 0xEEDCAA, 0, 0,
0, 0, 0xEEDCAA, 0xEEDCAA, 0xFF0000, 0xFF0000, 0xFF0000, 0xFF0000, 0xFF0000, 0xFF0000, 0xFF0000, 0xFF0000, 0xFF0000, 0xEEDCAA, 0, 0,
0, 0, 0, 0, 0xFF0000, 0xFF0000, 0xFF0000, 0, 0, 0xFF0000, 0xFF0000, 0xFF0000, 0, 0, 0, 0,
0, 0, 0, 0x542200, 0x542200,0x542200, 0, 0, 0, 0, 0x542200, 0x542200, 0x542200, 0, 0, 0,
0, 0, 0x542200, 0x542200,0x542200, 0x542200, 0, 0, 0, 0, 0x542200, 0x542200, 0x542200, 0x542200, 0, 0];
await BrainPad.Display.DrawImageScale(a, 60, 35,3,3,BrainPad.Display.TransformNone);
await BrainPad.Display.Show();
await BrainPad.Digital.Write(reset, true);What’s Next?
Draw on the screen, and have fun!
Try to put everything together from loops and variables. From here you can jump right to the Math Art lesson.
BrainStorm
Why do buttons on PC applications look similar? That is because Windows has a built-in “Button()” that developers typically use. Can you create a method that draws a “button”? Hint: This is nothing more than a DrawRect() with DrawText() in it.